
WORKFLOW
OPTIMISING WORKFLOW
Where your images will end up governs to a large degree how your workflow will go. For example mine will nearly always end up in print or on-line. This means my work will never be reproduced any larger that A3 (double page spread) at the most. Couple this with my 36 megapixel camera, means that I have a lot of flexibility. My images are never going to be seen in a gallery where a viewer can spend 10 minutes or more studying an image. They will be in a book that may have a life measured in seconds.
So when you get to edit your images, it’s a good idea to have a flow that is constant. Bring up your image and analyse it, or look at the notes you may have made when you shot it? For instance, looking at the opened image below (b) you can see that the tones are not balanced, the shadows and highlights are too opposed. Of course this is not how it looked but is how the camera ‘recorded’ it. But this is just my way of shooting, as I generally try and expose for the highlights, letting the shadows darken to keep as much highlight detail as possible. The shadows can then be opened up and balance the image to how I saw it. This example was taken at the colourful village of Collioure in the south of France. This tutorial will show how to rebalance your image, adjust colours, and remove unwanted objects.


THE METHOD (from Adobe Bridge to Adobe Photoshop).
a. Open the camera raw file in Bridge (in this case a Nikon NEF file)
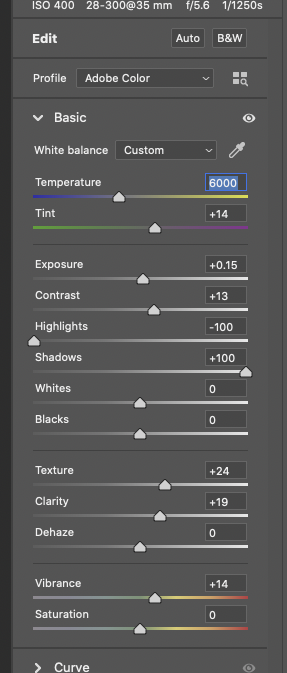
b. In Bridge use the Basics dropdown menu. Here you need to open the shadows (slider to the right) and close the highlights (slider to the left).
c. You can see that this action alone rebalances the tones instantly.
d. Next choose the ‘Optics’ dropdown and choose your camera and lens. This corrects any ‘Chromatic aberration’ and adjusts the format to
the lens you used. Note the vignette in the top left of (b) has been removed by this action.
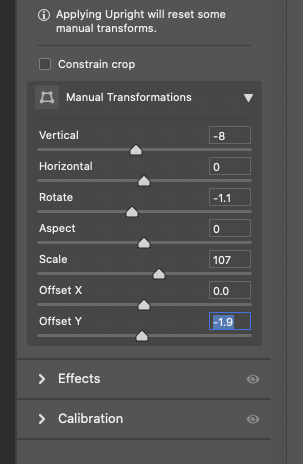
e. The ‘Geometry’ dropdown will correct any perspective miss-alignment, such as the tower or any other leaning object.
e_1. Click ‘Open’ this will open the image in Photoshop ready to edit the colours.
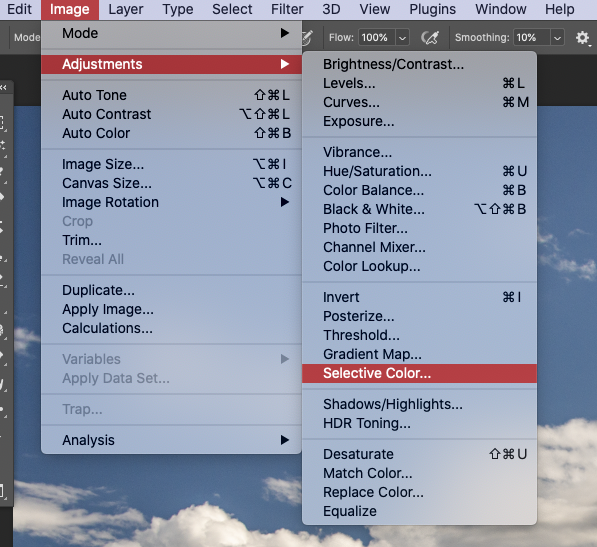
f - g. In Photoshop, under ‘Image-Adjustments-Selective Colour’ here you can improve the individual colours.
Shadow areas after midday will always have an element of blue in them, so a tiny use of the ‘Neutrals’ slider here can help out.
h. Final colour edited frame ready to use some detailed tools.
i,j,k. You can start removing distracting objects if you want with the ‘Clone Stamp Tool’.
l. Final edited and cleaned frame.


All photography and information © Jon Davison 2022.