
TIMES OF DAY
LIGHTING - Times of day
The quality of light has the power to change your subject in its setting, from the mundane to the extraordinary and vice versa. It’s almost magical that an ordinary object at midday that you may normally not bother to look at, will draw you to it at a different time of day, simply becasue of how different it appears. And that in a nutshell, is the world of the photographer, it’s what things look like that motivates us.
Pre dawn to dawn
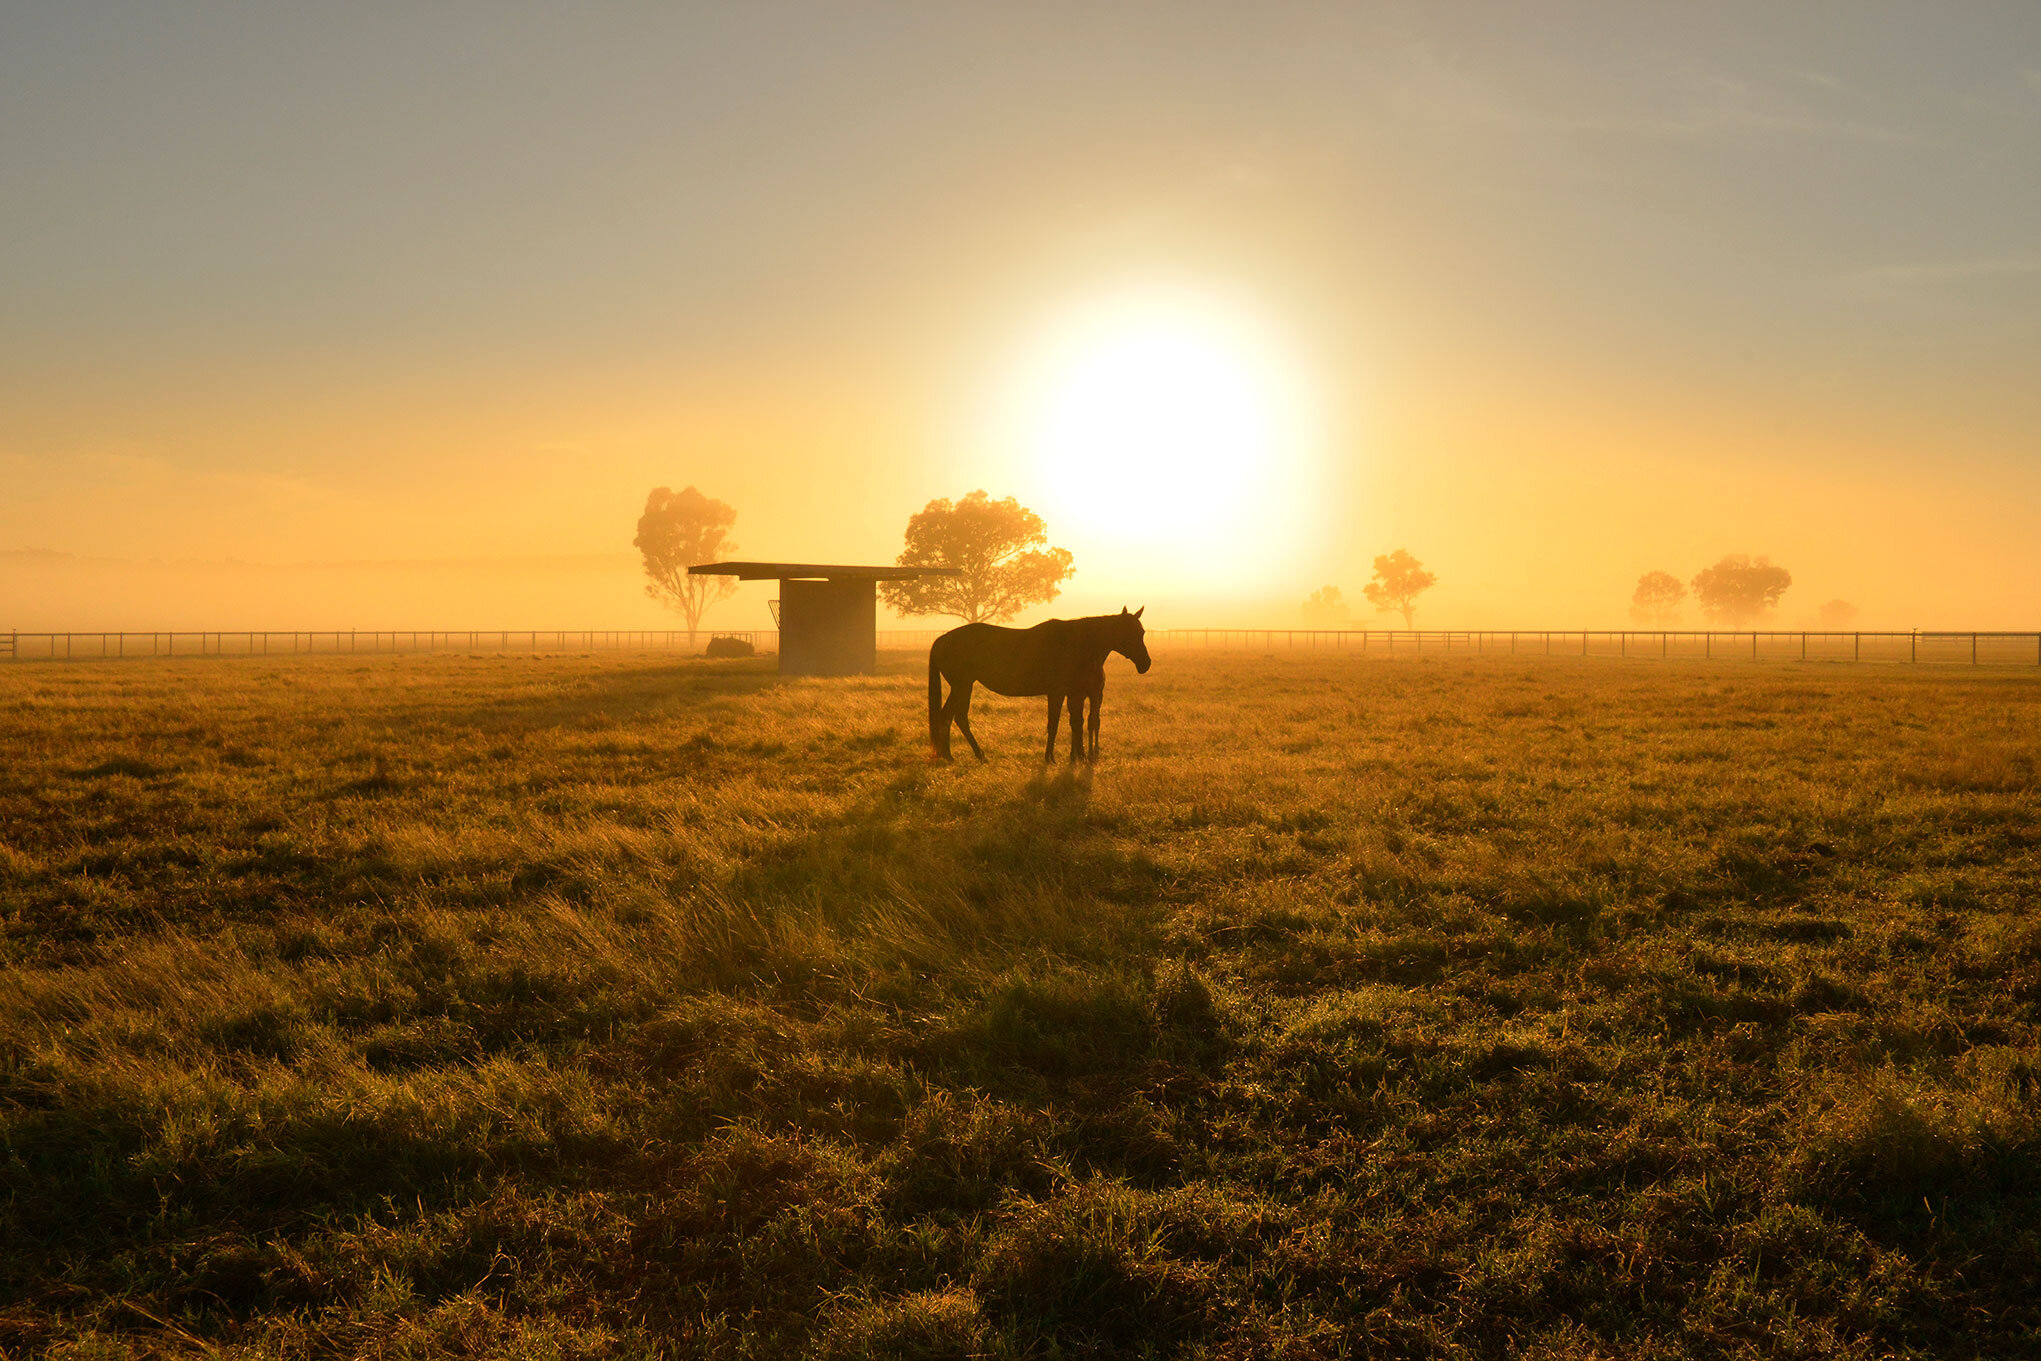
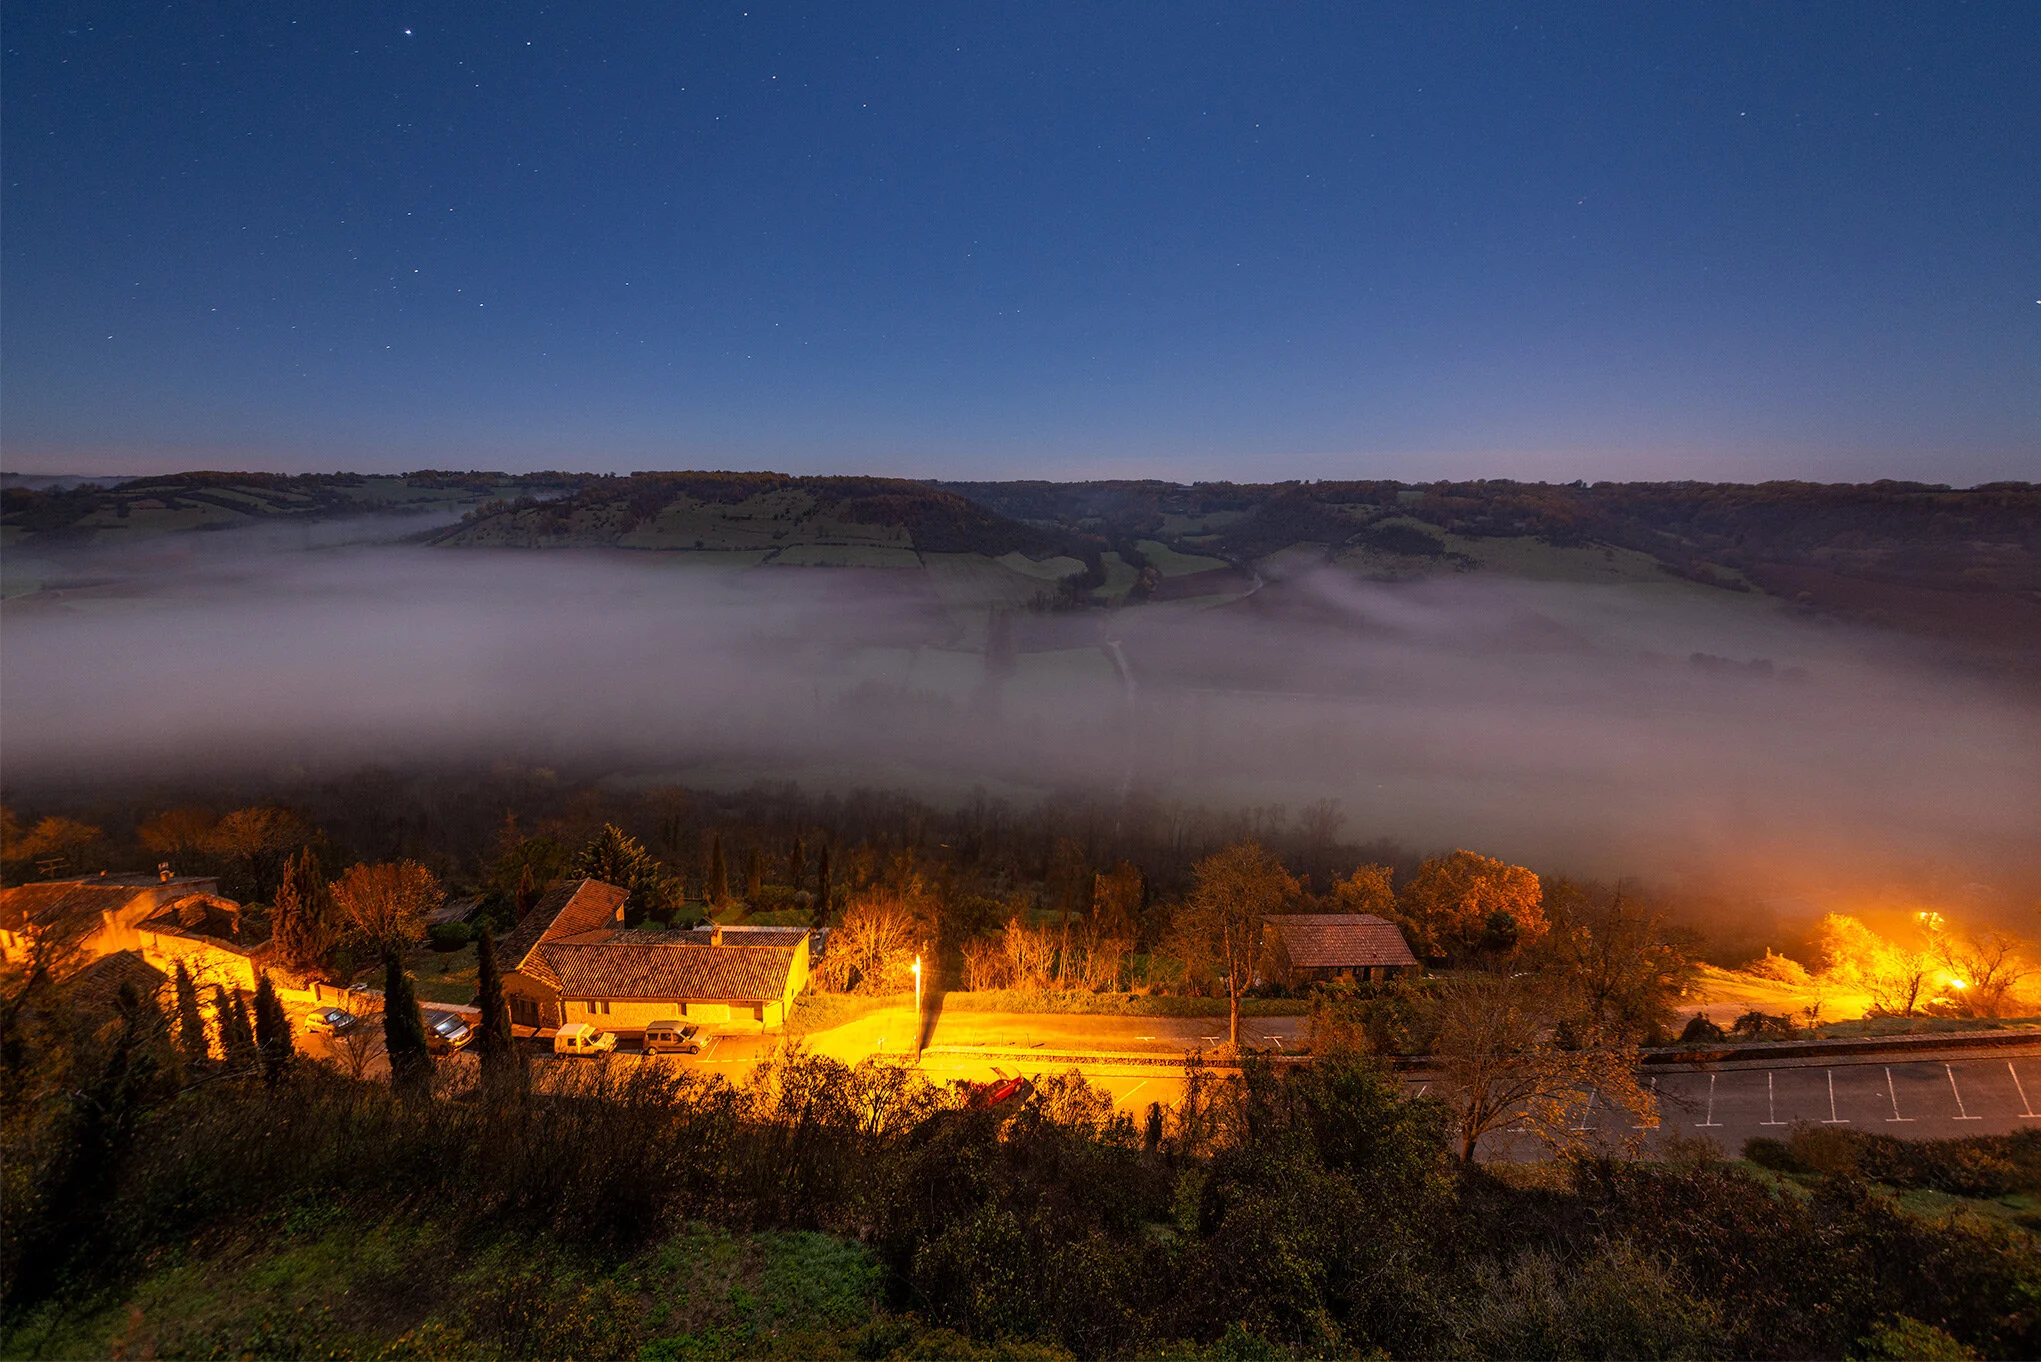
Pre-dawn is a special time as the sun - still below the horizon - starts to open up the dark spaces left over from the night. The big problem with shooting at these times of course is that you have to get up early, especially European summers during daylight saving. You may need to be on location around 05:30 am ready to shoot at 06:00, which is hard. Ground mist in river valleys is best seen at dawn and makes for some spectacular imagery, some can linger for up to an hour or more after sunrise. The end result is usually well worth it as you will experience situations that often take your breath away.


These are great subjects for time-lapse sequences, as over a one hour sequence, the mist can often appear to swirl in wave like patterns, often changing direction as the land heats up.
Sunrise
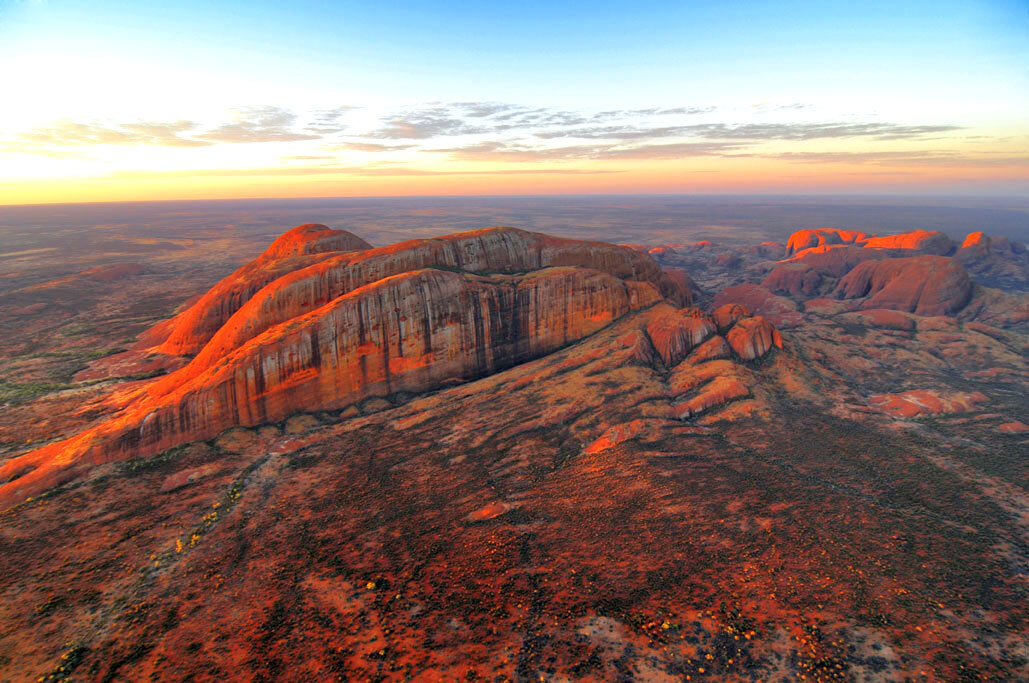
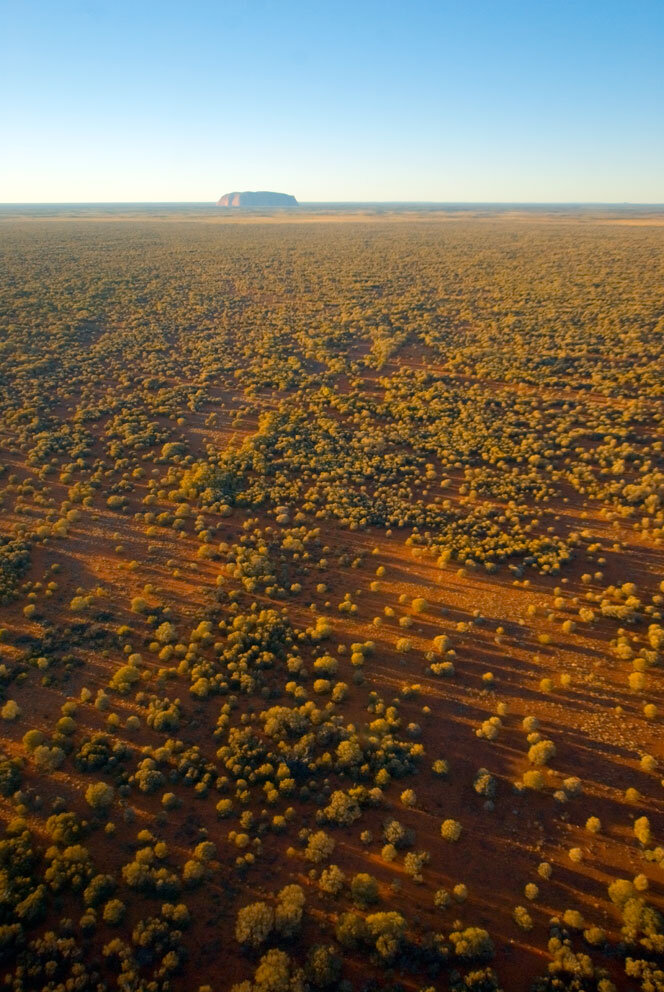
When the sun does finally rise above the horizon, it does so with attitude! It is intense and seems very sharp. Like sunset, dawn light is warm but generally softer. Urban skies in general will have more haze in the atmosphere compared to rural or desert areas like say the Australian Outback. But because the light is almost horizontal, in the desert it will clearly define any irregularities that may not be visble during the day, for instance like the wind blown ridges near Uluru.


Midday
By now, the rising sun has lost its warm tones through the atmospheres filtration process, and is now passing through its thinest point. Because of this we have pure white light that has all the colours of the spectrum. Colours are very intense, shadows are black and generally colourless, and whites have little or no colouration. It’s quite good light where you need clean illumination from above, as shadows will be falling directly below your subject, but due to this, it’s very unflattering light for portraits. With the Sunflower field the sun is illuminating the foliage and landscape in general, whilst the shadows fall directly beneath the foliage. The New Zealand Pohutukawa tree is lit by the pure white light of noon, making all the colours quite vivid and intense. Again, the shadows are falling beneath the tree.


Becasue the light is so intense at this time, there will be a lot of contrast, so a sympathetic use of in-camera or post-production HDR will help balance the composition to how you percieved it. At midday, If you can get an elevated view on to your subject, like the Monarch butterfly the sun should be directly above you, so the shadows will be falling beneath your subject. This will let you see the true colours of insects and flowers. The Croatian coastal city of Dubrovnik has been captured around 14:00 and the colours are vivid and clean with no colouration in the highlights or shadows. This is a great time where the almost vertical sun illuminates the sandy bottom of rivers, reefs and harbours offering a contrast to the warmth of the roof tiles.
Late afternoon
The sun is now passing through more of the atmosphere and losing the shorter wavelength colours of blues and whites in the process. This gives a warmer light and longer shadows. It is a very flattering light for most subjects with the angle of the sun giving a nice contrast. The shadows are not too black yet as the light is bouncing off nearby buildings filling in the spaces. Backlight will start playing a role here now as the sun almost 30 degrees to us. This flattering warm light will only increase intensity now as the sun sets.


Sunset
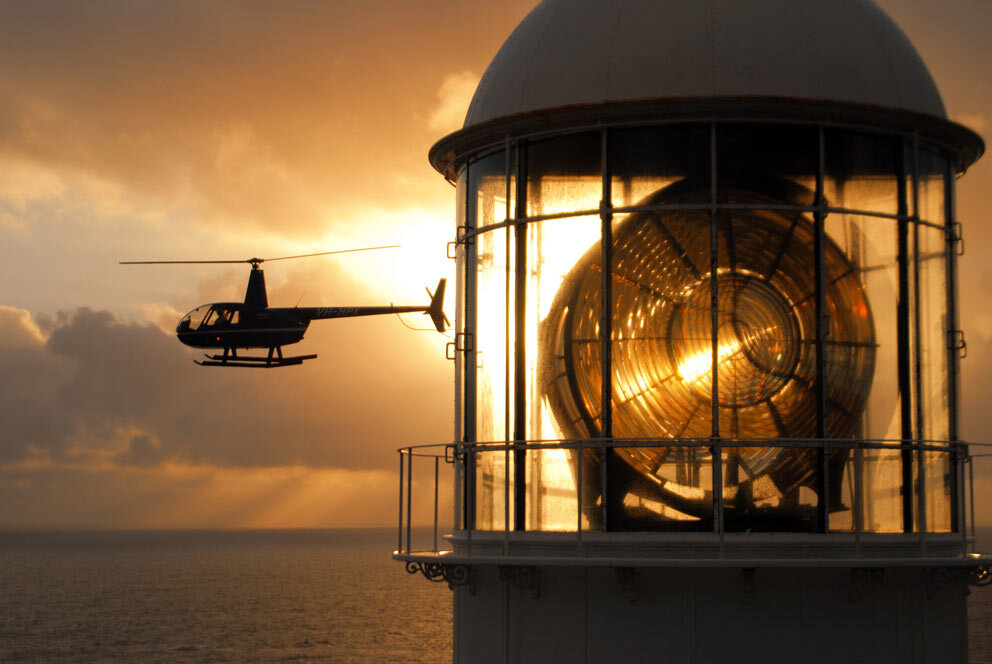
Like sunrise, sunset is full of drama, with intense colour covering a whole plethora of lighting scenarios from a brilliant orange ball, to saturated red and orange skies and silhouettes. It is probably most specatular when there is some cloud around as they tend to hold the colour, more so than the clear sky. With sunsets you can shoot for the highlights and have dark shadows to get silhouettes, you can shoot wide to show it’s colouration on a beach, or you can turn around and shoot what it is bouncing off. Sometimes the latter gives the best results. Either way, it is hard to miss when shooting sunsets, just remember if you can, to eclipse the sun itself if possible. Note that all these examples have the sun just out of frame or eclipsed by an object like the horizon or the lighthouse.
Not only is it possible to shoot into the sun, but often they will be among some of your best shots. But to help achieve this, find something that can eclipse the suns orb.


Reflected light
By looking around to see what the suns rays may be striking, rather than watching the sun setting, you may find a whole array of subject matter. When you combine this kind of lighting with something as simple as the couple walking under the bridge in Toulouse, the image takes on an almost unreal scenario. You will only have a few seconds but that is often enough. If the light and setting is right, just wait, keep your eyes peeled and something will usually turn up. Any later and the shadow of the bridge would have swallowed them, any earlier and they would be too small. So patience and visual awareness are two things you need to cultivate. The reflected highlight off the trimaran offers drama that only this type of lighting can.


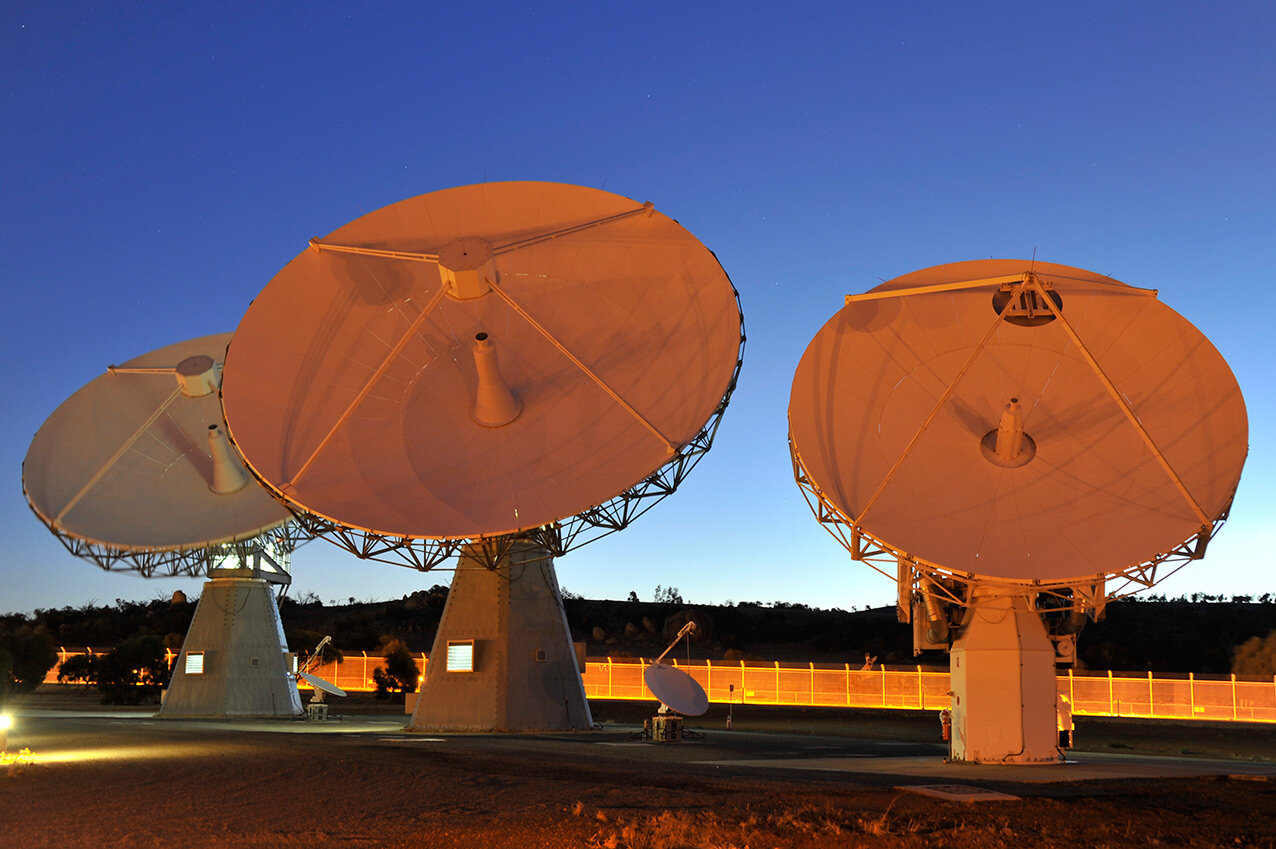
Night
In the country, compared to a city, there will be very few lights and the stars will be a lot clearer. So in general when shooting at night, you will need to set your camera to manual mode as the exposures will be longer than for daylight. If you want to shoot stars then a wide-angle lens is a good idea, plus a tripod, fingerless gloves if it’s cold, a torch (red if possible), and an external shutter release.
The harbour scene at Mapua, New Zealand was taken at midnight on a 40 second exposure with a tripod. The focus is set on the foreground yacht and no additional lighting was used apart from the light coming from the cafes and homes.


A tall tripod that extends to eye level height when your camera is attached is ideal. It’s very hard bending down, at night, trying to set up the shot through your viewfinder. Your touch screen is better for composition if you have one. But you want to keep your ‘night vision’ as much as possible, so a red torch is better here. It’s a good idea to check out your composition the night before to see what time suits it best. But before you go outside, attach your camera to your tripod and set its height. Set your focus on infinity, then turn auto-focus off.
For most star/sky scapes at night if you are using a wide-angle lens, an exposure of 30 - 40 seconds and an aperture of f5.6 with an ISO of say 800 will give you some good results. Then attach your external shutter release, either cable or blue-tooth, then you are ready. Give yourself a good 20 minutes to get your night vision. If you expose for longer than 30 - 40 seconds, the stars will appear as streaks, cool if you want it but not if you don’t.
All photography and information © Jon Davison 2022.