
PC12 PORSCHE
PHOTOSHOP - Creating a digital studio from a location shoot
Here is an example of salvaging a situation knowing the capabilities of Photoshop. I was asked to create a ‘magic scene’ involving a Pilatus PC12 aircraft and a Porsche car. The problem was that it was a grey crappy day with no inspiration, so my initial thought was to move the PC12 and car into the hangar and use it as a studio, but not possible as neither the aircraft or car could be moved. So I took two frames, a wide one with the aircraft and car, then a closer one of the car as I would enlarge this, and that was it. The rest would be managed with Photoshop in post production.

THE METHOD
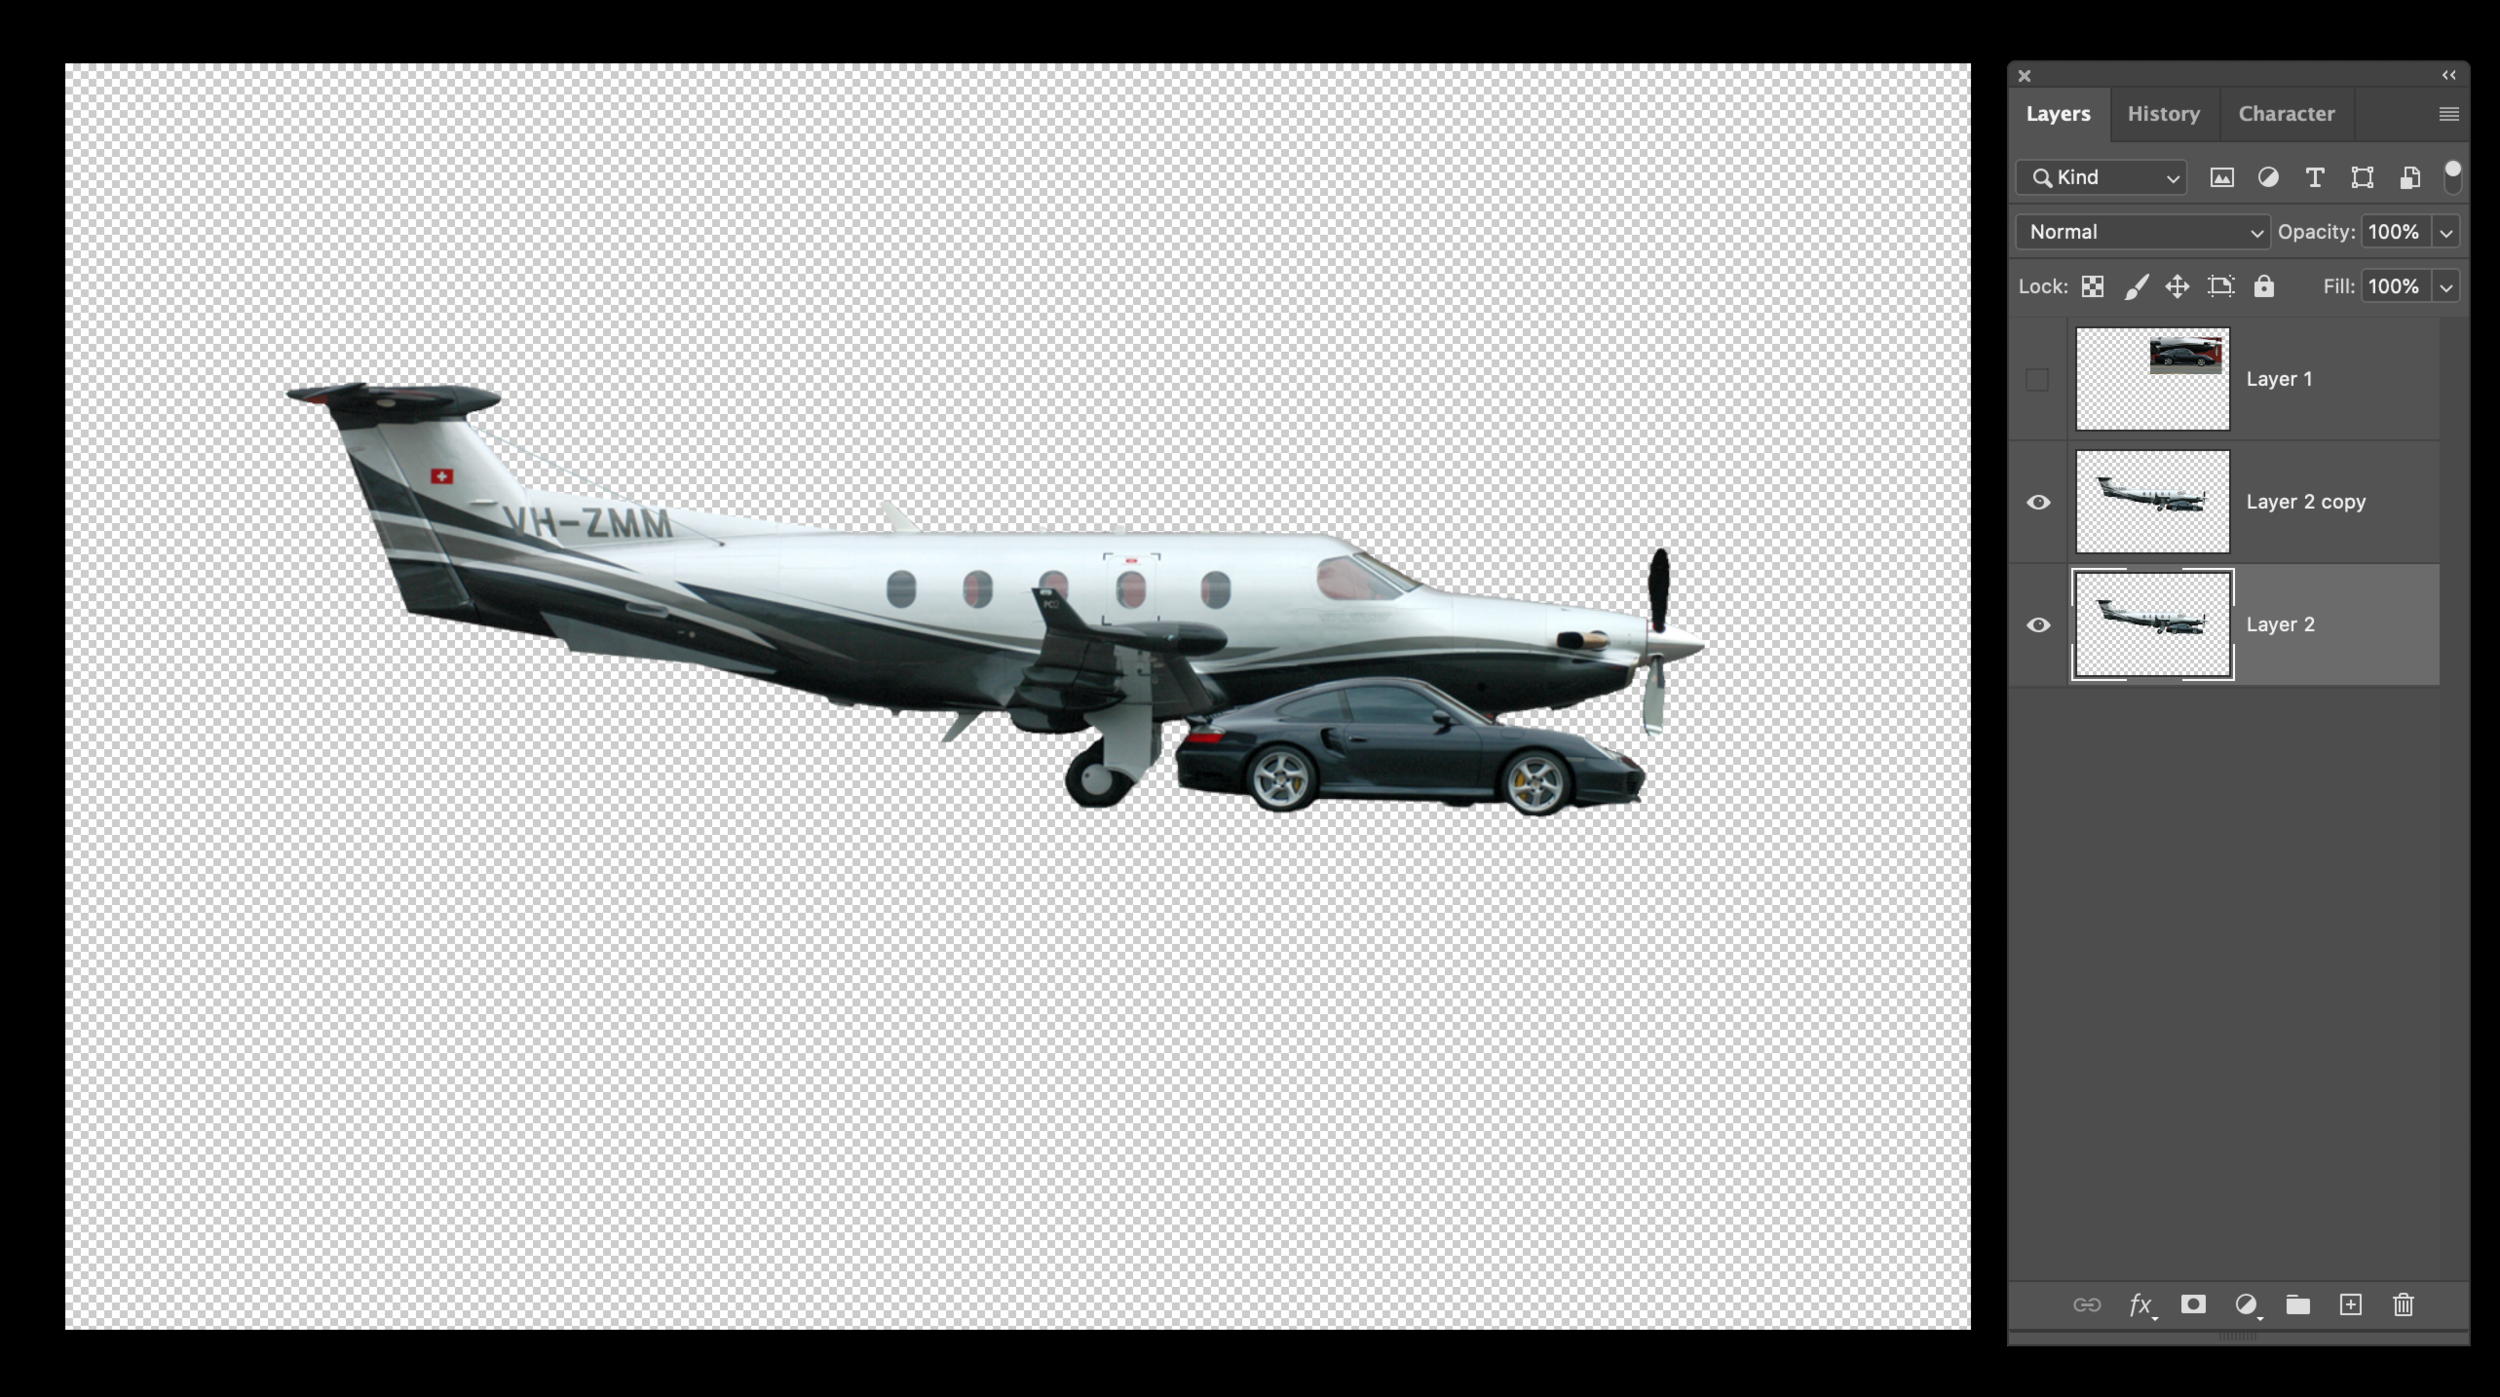
1. Opened both the images (1) in Photoshop and make sure your Layers Palette is open.
then open and copy the car (2) as a second layer to (1).
3. Clicking the aircraft layer, select the Magic Eraser tool (E) and erase the background around the aircraft.
4. Duplicate the aircraft layer (Co-J).
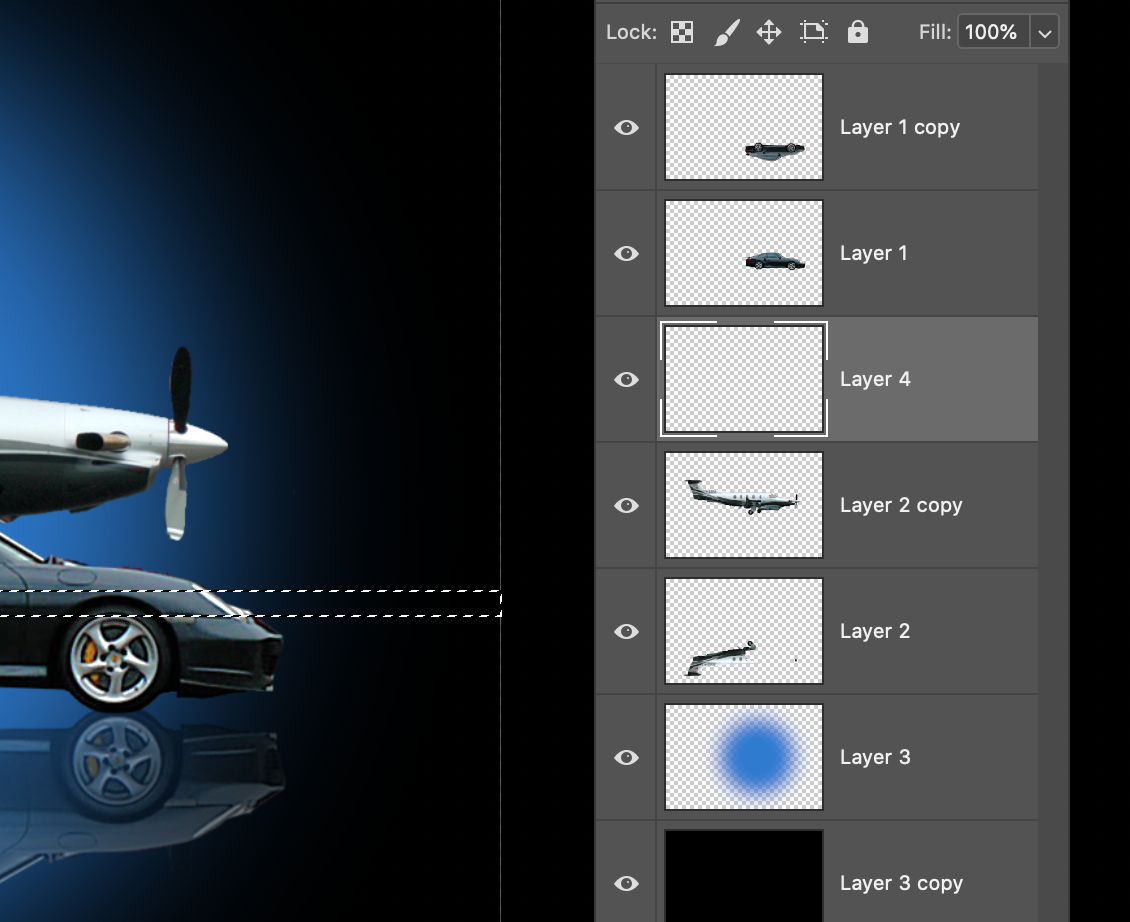
5-6. Invert (Edit - Transform - Flip - Vertical) this layer to give the mirror effect.
7. Create a new layer for the circle.
7. Make a new layer, drag it to the bottom of the layers stack. Default your colours to mono (D) and fill with black (Option-Delete)
8. Make new layer for the circle.
9. Click the top colour Foreground colour swatch, select a blue tint or type in (2179d3)
10. Select the Ellipse Marquee Tool, holding SHIFT turns this into a circle. .
11. Then drag the circle to roughly this size
12. Then fill this with blue (Option - Delete).
13-14. Next blur the circle. (Filter - Blur - Gaussian Blur - 123%).
15. Cut out background from the car.
16. Use Levels to increase the contrast of the car.
17. Click on the blue circle layer, with your Rectangular Marquee Tool cut the circle somewhere beneath the aircraft (X) then paste (V)
18. Place cut circle and change the Opacity to something like 15% or whatever you think look best.
19. Select the car layer. With your finger on Co, click the car icon in the layers palette. This will select the car outline.
20. Now select the top aircraft layer and cut (X). This will cut the car shape from the aircraft to give a black background behind the car.
21.


All photography and information © Jon Davison 2022.