
MULTIPLE FRAME PORTRAITS
PHOTOSHOP - Multiple layer portraits
This is a very cool and easy way of making a portrait where you either reposition one subject or more to create an interesting dynamic. For this BAE full page add ‘Together we are one’, we had to show one man and his multiple levels of responsibility on the production line during the re-manufacturing of the Amy’s M113 armoured personnel carriers. We settled on 6 positions for him.
METHOD
For this the camera must blocked off on a tripod, and exposure and focus preset and also locked off. The idea is that nothing but the subject must move, over say 6 or more frames. So every exposure is the same, except the subject has moved to a different part of the scene for each shot.
Now comes the fun bit. In Photoshop, open all the files as a layer stack. Then starting from the top layer, simply use your eraser tool to erase a hole to reveal the mans position in the layer below. Then merge the top layer and the one beneath together. Do this 5 times. To help see exactly where the subject has moved to, you can change the opacity to say 50% so that you can see his outline, but change it back to 100% before you merge it down to the next one.


So you can see that in the original sequence that it does not matter that my assistant is holding a light stand. It is simply erased out.
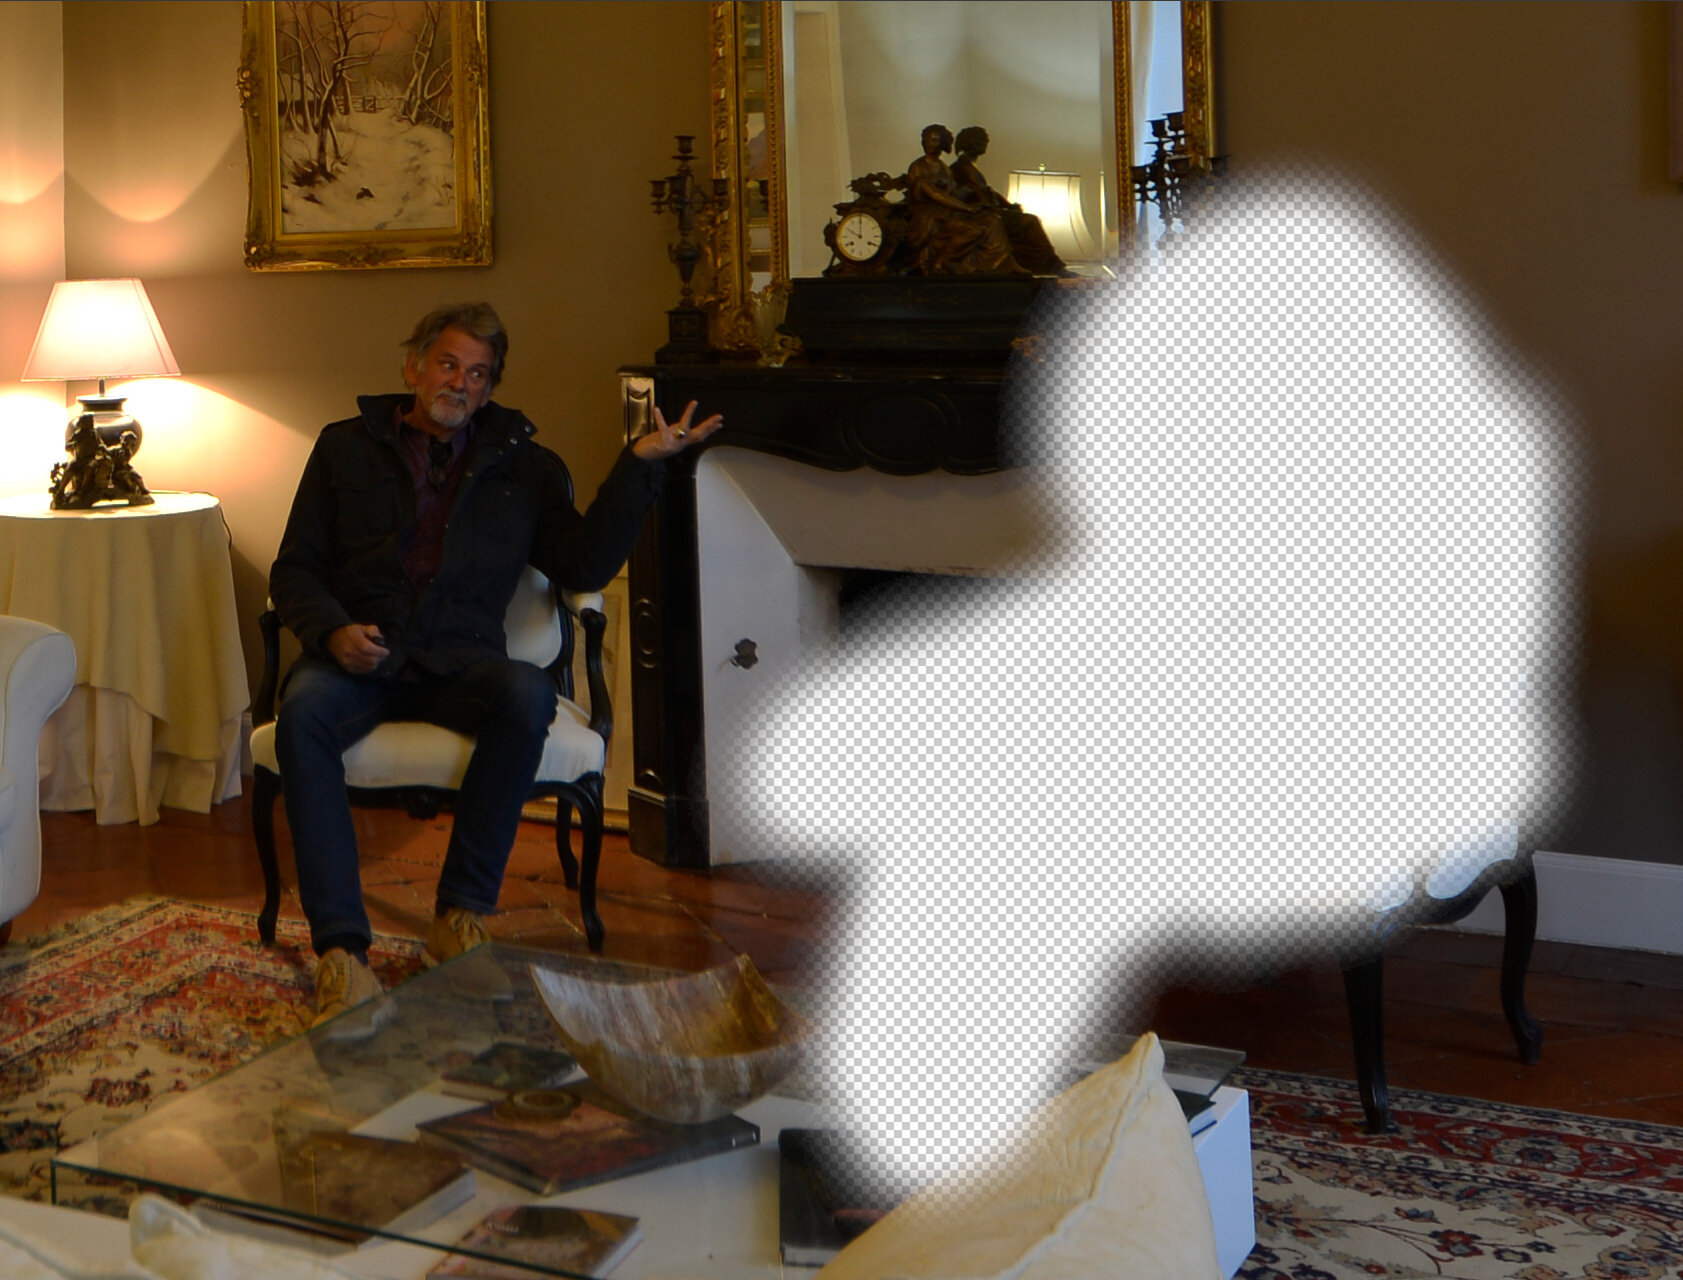
Self portrait
Here was a shot with yours truly seated in two locations. In Photoshop, layer (a) is placed on top of (b) and a hole is erased in it (c) to reveal my position (d). If you are used to using vector masks, then by all means use this method. I prefer to use the eraser tool and work with pixels, just my choice. They both work.


A subject like the chef was a perfect portrait as he performed so many tasks in the course of creating a meal.
All photography and information © Jon Davison 2022.